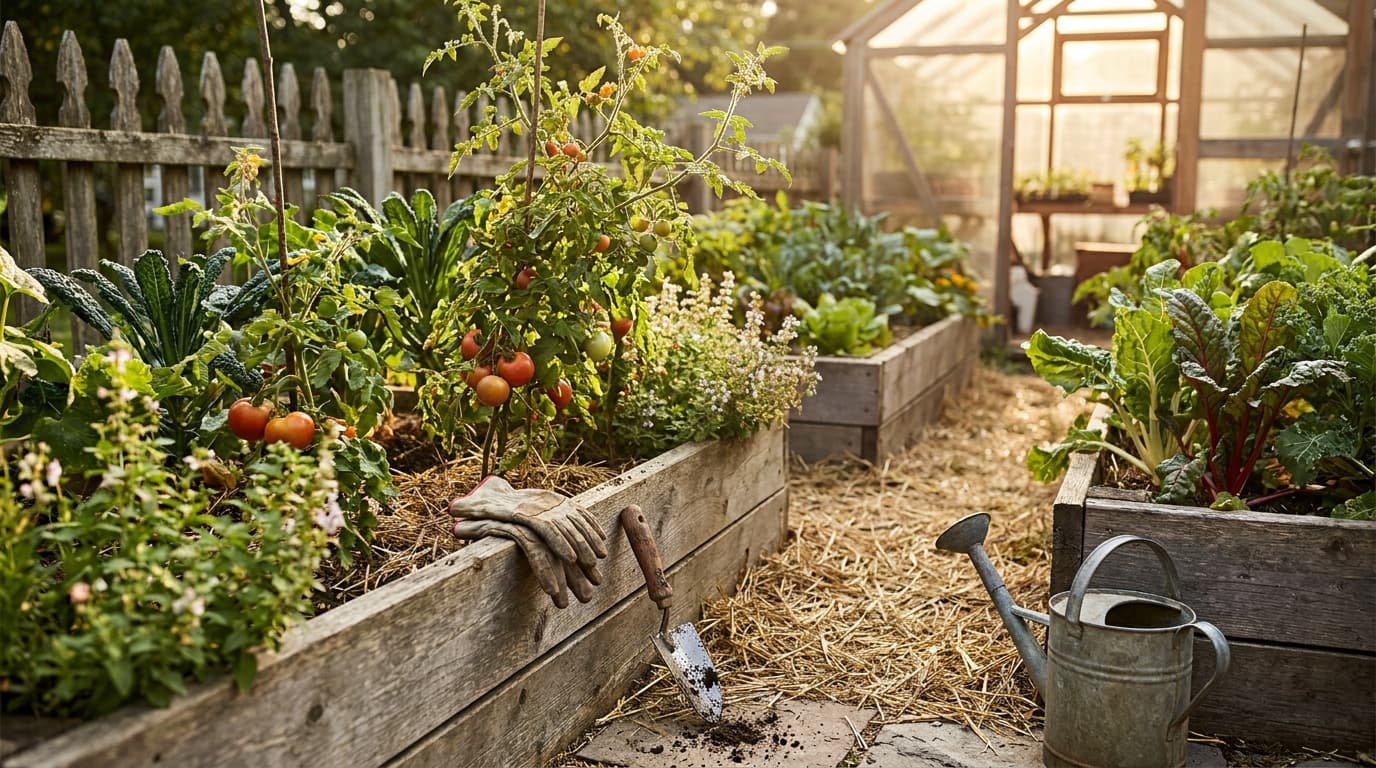
Start with sun, not shape
Before you draw a single bed, watch where the sun falls. The prettiest layout on paper fails if half of it sits in shade. Most fruiting vegetables, including tomatoes, peppers, and squash, need 6 or more hours of direct sun to crop well. Leafy greens and many herbs tolerate less, so map your sun first, then assign crops to match.
Spend a sunny day noting which areas get morning, midday, and afternoon light. Buildings, fences, and trees throw shade that moves through the day and shifts across the season. Put your sun-hungry crops in the brightest spots and save partly shaded corners for greens. If your only space is shady, our guide to growing vegetables in shade covers what actually produces there.
Orient beds and place crops by height
Once you know your sun, orientation does the rest of the work. Run beds so that tall crops do not shade shorter ones for most of the day.
Arranging crops within the garden
Put tall crops to the north
Step down by height
Group by water need
Put frequent harvests near the path
Size beds and paths for your reach
The most common beginner mistake is building beds you cannot reach into. You should never have to step on growing soil, because stepping compacts it and undoes the loose structure roots need.
Length is up to you and your materials. Several short beds give you more access points and make crop rotation easier than one long bed.
Decide between rows, blocks, and intensive planting
There is no single correct pattern, only tradeoffs.
Traditional single rows with wide aisles make hoeing and harvesting easy and suit large plots and machinery. Block or grid planting (often called square-foot style) packs more into a small space by spacing plants evenly in all directions instead of in rows, which shades out weeds and uses raised beds efficiently. Most home gardeners do best with block planting in defined beds, since it maximizes a small footprint and keeps soil off-limits to feet.
Whatever pattern you choose, leave room for succession sowing. As you pull early radishes or lettuce, have something ready to fill the gap, and use the planting calendar to time those follow-on sowings for your zone.
Plan crop rotation from the start
Planting the same family in the same spot year after year builds up soil pests and diseases and depletes the same nutrients. Rotation breaks that cycle, and it is far easier if your layout supports it from day one.
Group crops by family and move each group to a different bed each year. A simple four-group rotation works for most gardens:
Sketch your beds and label which group is where. Next year, shift each group one bed along. With four beds you return to the start every four years, which is enough of a break for most common problems.
Build the beds and the soil
If you are gardening in raised beds, get the depth and soil right before you plant. Our guides to the best raised garden beds and the best soil mix for raised beds cover sizing and filling. Whether raised or in-ground, plan a watering system into the layout now, since retrofitting one around mature plants is awkward.
Plan the vertical dimension too. Putting a trellis on the north edge lets tall crops like tomatoes, pole beans, and cucumbers grow up instead of out, which frees ground space and keeps their shadow off shorter crops. Set the trellis when you build the bed, not after the plants are sprawling. A rigid steel panel stays put under a loaded vine far better than flimsy netting.
Some links on this page are affiliate links. As an Amazon Associate I earn from qualifying purchases.
AMAGABELI
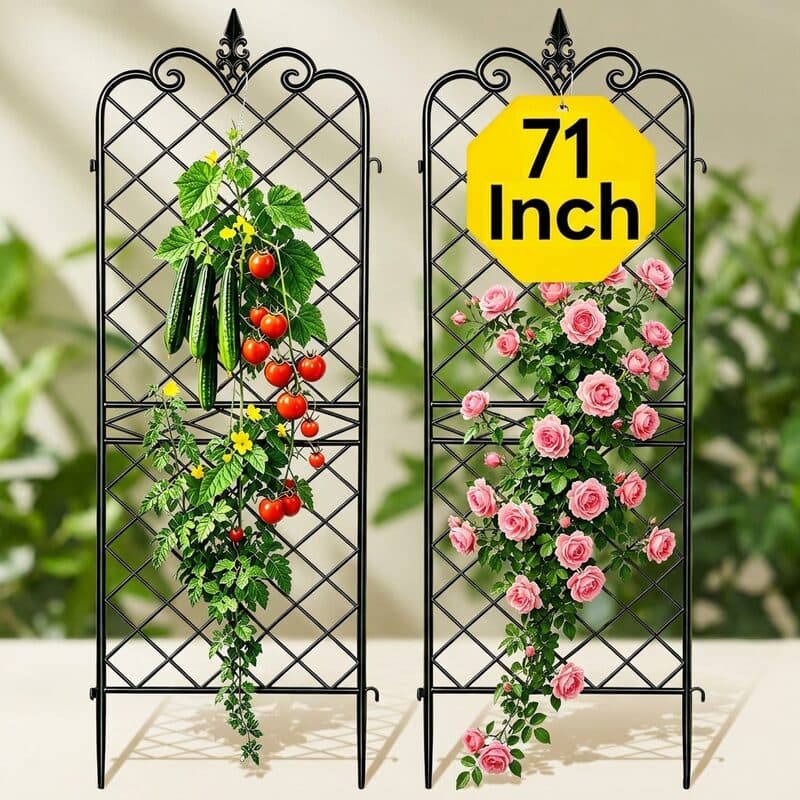
AMAGABELI Metal Garden Trellis for Climbing Plants (60 x 18 in, 4-Pack)
Best for: Gardeners who want sturdy, attractive metal panels to line a raised bed or pot with a support that outlasts netting.
Keep in mind: 18-inch width means multiple panels are needed to cover a longer row
Amazon price as of the checked date, subject to change. The price on Amazon at checkout applies.
Full research
- Dimensions
- 60 in x 18 in per panel
- Pack
- 4 panels
- Material
- Rust-proof powder-coated iron
- Finish
- Black
AMAGABELI's four-pack of 60 x 18 inch powder-coated black iron panels provides a clean, rust-resistant climbing lattice for cucumbers, beans, roses, and clematis in beds or pots.
This catalog-wide research score is separate from this guide's use-case ranking. How we research
Strengths
- Rust-proof powder-coated iron survives seasons of outdoor rain without flaking
- Four-panel pack covers a full raised bed row at a reasonable per-panel price
- Clean grid design works in both vegetable beds and ornamental borders
Weaknesses
- 18-inch width means multiple panels are needed to cover a longer row
- Upright panels need to be staked or tied to avoid leaning under a heavy loaded vine
Sprout Score breakdown
Best for
Gardeners who want sturdy, attractive metal panels to line a raised bed or pot with a support that outlasts netting.
Owner rating snapshot
Amazon · 82 reviews · 4.6 stars
How do I lay out a vegetable garden for beginners?
Start with sun: put crops that need 6 or more hours of direct light in your brightest spots. Place tall crops on the north side so they do not shade shorter ones, keep beds narrow enough to reach across without stepping in, leave comfortable paths, and space every plant to its mature size. Then plan to rotate crop families between beds each year.
Which direction should vegetable garden rows run?
Orient beds so tall crops sit on the north side and step down to short crops on the south, which keeps tall plants from shading shorter ones. The classic advice to run rows north to south matters most for tall, trellised crops. For low crops in raised beds, exact row direction matters far less than overall sun exposure.
How wide should garden beds be?
No wider than you can comfortably reach to the center without stepping on the soil. About 4 feet works when you can reach from both sides, and about 2.5 feet when a bed sits against a wall. Stepping on growing soil compacts it, so width should always follow your reach.
What vegetables should not be planted next to each other?
Avoid clustering heavy feeders from the same family, since they compete and share pests. Keep sprawling crops like squash away from crops they will overrun. The bigger rule is rotation over time: do not plant the same family (for example tomatoes after peppers, both nightshades) in the same spot in consecutive years.
A good layout is mostly about respecting sun, reach, and time. Get those three right, plan rotation from the first season, and the garden becomes easier to tend and more productive every year.