Onions are a long-season crop that rewards one decision made before you plant anything: getting the day-length type right. Plant the wrong type for your region and your onions will either bolt prematurely or produce disappointingly small bulbs, no matter how well you water and feed them. Get the type right and onions are steady, low-maintenance plants that store for months.
Day length: the most important onion decision
Onions form bulbs when day length crosses a certain threshold, not when a certain date arrives. Varieties are classified by the day length that triggers bulbing:
Matching onion type to your location
Long-day onions
Bulb when days reach 14 to 16 hours. These are the varieties for gardeners north of roughly the 38th parallel (roughly: Kansas, central Virginia, and northward). They include popular storage onions like Copra and Walla Walla. Plant in spring for a summer harvest.
Short-day onions
Bulb when days reach 10 to 12 hours. The right choice for gardeners in the deep south (roughly south of the 35th parallel). They include sweet varieties like Vidalia, Texas 1015, and Granex. Planted in fall or early winter for a spring harvest in warm climates.
Intermediate-day onions
Bulb at 12 to 14 hours of daylight. Suited to the transition latitudes between those two regions. Varieties like Candy and Super Star are labeled intermediate-day and are more forgiving if you are unsure of your region.
When to plant onions
Onions tolerate cold and are typically planted early in spring. The exact timing depends on your planting method:
Transplants started indoors or purchased as bundles go out 4 to 6 weeks before your last spring frost, once the ground is workable. Transplants 10 to 12 weeks old (pencil-thick stems) give the best results.
Sets (small dormant bulbs purchased pre-formed) can go in as soon as the soil can be worked in early spring, even earlier than transplants. They establish quickly but are more prone to bolting (premature flowering) than good transplants.
Direct seeding outdoors works but requires a very early start, often before soil is workable in northern regions. Starting seeds indoors 10 to 12 weeks before transplant date is the more reliable path.
Use the planting calendar to find the specific window for your ZIP code. Onion timing is closely tied to your frost dates and your latitude.
Sets, transplants, or seeds: which to start with
Choosing your starting point
Transplants
Best overall results for home gardeners. Started indoors or bought as bundles, transplants are established enough to hit the season running without the bolting risk of sets. They give better variety selection than sets too.
Sets
Fastest and easiest to plant. Small, inexpensive, and available everywhere. The main drawback is that sets, especially large ones, are more prone to bolting. Choose the smallest sets available (marble-sized), and select a bolt-resistant variety.
Seeds
Most variety choice and lowest cost per plant, but you need to start them 10 to 12 weeks before your transplant date and provide strong indoor light. A good project if you are already set up for [starting seeds indoors](/growing/how-to-start-seeds-indoors).
Soil, site, and bed prep
Onions want full sun (at least 6 hours, preferably more) and loose, well-drained, fertile soil with a pH of 6.0 to 7.0. Loose soil lets bulbs expand without resistance; compacted soil produces misshapen bulbs.
Work in a 2- to 3-inch layer of compost before planting. Onions are relatively heavy nitrogen feeders, especially early in the season when they are building the leaf tops that will eventually feed the bulb. A raised bed is ideal: perfect drainage, loose soil, and easy access for the long season.
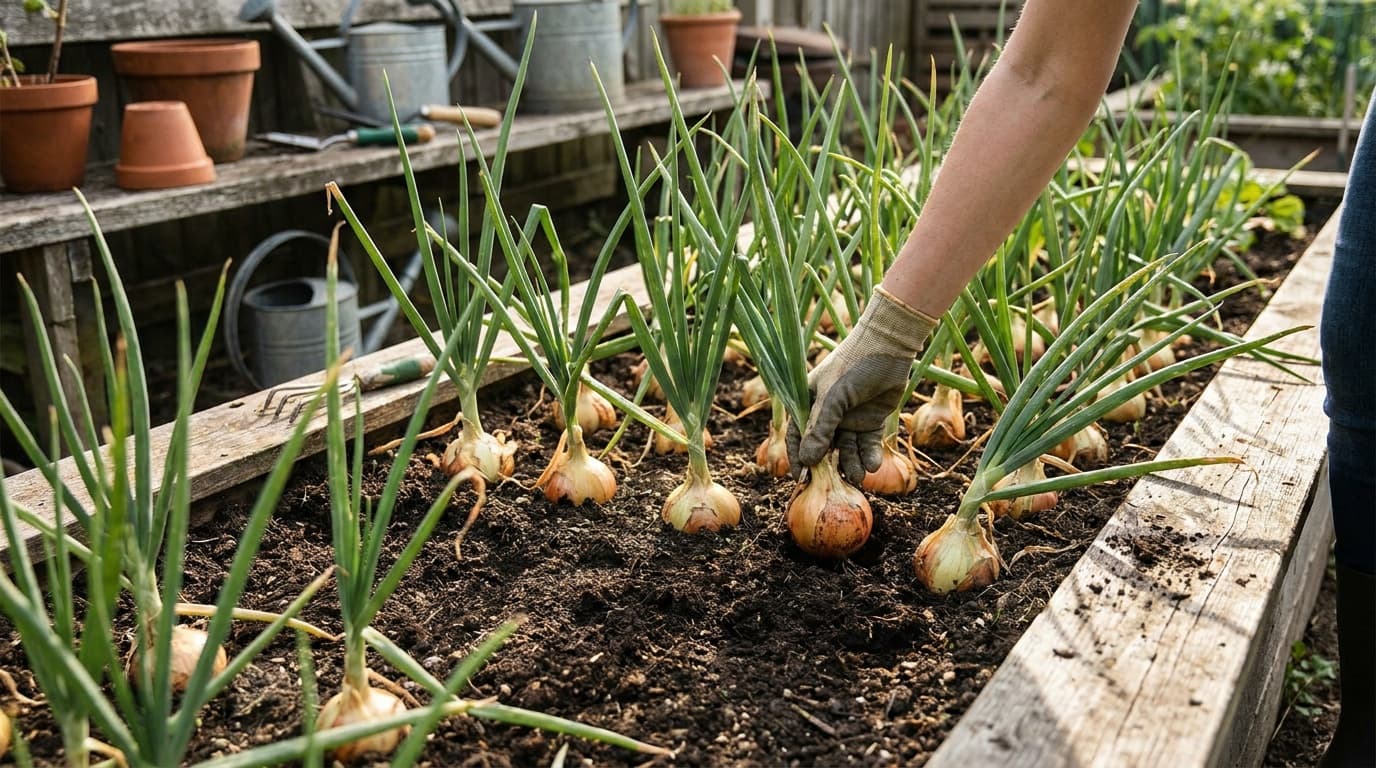
Planting
Set transplants or sets 1 inch deep and 4 to 6 inches apart in rows 12 to 18 inches apart. For green onions or scallions, space as close as 2 inches. Larger bulb onions need the fuller 5- to 6-inch spacing to size up.
The tips of sets should just break the soil surface, not be buried deep. Transplants go in at roughly the same depth they grew in the flat, with roots down and the white stem base just at or slightly below the soil line. Firm the soil around each one and water in.
Watering and feeding
Onions have shallow root systems and are sensitive to both drought and waterlogging. Aim for consistent moisture, about 1 inch per week, delivered slowly so it soaks in rather than running off. A drip system or soaker hose along the row works well.
Taper off watering significantly in the last 2 to 3 weeks before harvest as the tops start to fall. Wet soil at the end of the season delays curing and invites neck rot in storage.
For fertilizing, nitrogen is the key early-season input. Work a balanced organic vegetable fertilizer into the bed at planting, then side-dress once when plants are 6 to 8 inches tall to keep leaf growth going. Stop nitrogen feeding once the tops are well established, around midsummer, so the plant shifts energy into the bulb rather than more foliage.
Common problems
Onion maggot is the most destructive insect pest: larvae tunnel through roots and bulbs, often wiping out entire rows. Row cover laid at planting and kept on until the flies have passed (late spring to early summer in most regions) is the most reliable prevention. Thrips cause silver streaking on leaves and weaken plants in hot, dry weather; strong water sprays and row cover during high-risk periods help.
Downy mildew shows up in cool, wet conditions as a grayish coating on leaves, while bolting (premature flower stalk formation) is most common with sets or when onions experience a cold snap after early warm weather. Bolt-prone plants will not form normal bulbs; snap the flower stalk off promptly and eat those plants fresh rather than storing them.
Floating row cover laid over newly planted onions is the single most effective defense against onion maggot fly.
Harvesting and curing
Onions are ready to harvest when at least half the tops have fallen over and the necks have softened. Do not wait for all tops to fall; harvesting while a few upright tops remain is fine and avoids over-maturation and neck rot setting in.
Harvest to storage
Loosen and lift
Use a garden fork to loosen soil alongside the row, then pull bulbs gently by the tops or lift with the fork. Avoid yanking, which can tear necks.
Dry in the field
Leave bulbs on top of the soil in the sun for a day or two if conditions are dry, to begin curing and to kill off root hairs.
Cure for 2 to 4 weeks
Move bulbs to a single layer on screens or a dry, airy, shaded spot (a covered porch, barn, or shed) with good airflow. Cure until the outer skins are papery, the necks are completely dry, and the tops crinkle when bent.
Trim and store
Cut tops to about 1 inch above the bulb (or braid softneck varieties) and trim roots. Store cured bulbs in a cool (32 to 40 degrees F), dry, well-ventilated spot. Properly cured storage onions keep 4 to 6 months or longer.
In the rotation and companion planting
Onions are useful rotation partners because they disrupt pest and disease cycles for other crops. Avoid planting in the same bed as other alliums (garlic, leeks) in consecutive years, as they share many of the same soil-borne problems. They grow well alongside carrots and lettuce. For more, see the companion planting guide and the general crop rotation guide.
What is the difference between long-day and short-day onions?
Onions form bulbs in response to day length. Long-day varieties (for northern gardens, roughly north of the 38th parallel) start bulbing at 14 to 16 hours of light. Short-day varieties (for the deep south) bulb at 10 to 12 hours. Plant the wrong type for your region and bulbs will either fail to size up or bolt prematurely. Check the day-type label on any variety before buying.
Are sets or transplants better for growing onions?
Transplants generally give better results: more variety choice, lower bolting risk, and more consistent bulb size. Sets are faster to plant and widely available, but larger sets bolt more readily. For best results from sets, choose the smallest ones available and a bolt-resistant variety.
When should I harvest onions?
Harvest when at least half of the tops have naturally fallen over and the necks feel soft rather than firm. Loosen the soil with a fork, lift the bulbs, and cure them in a dry, well-ventilated spot out of direct sun for 2 to 4 weeks until the outer skins are fully papery and the necks are bone dry.
Why are my onions bolting?
Bolting (sending up a flower stalk) is most common with sets or when onions experience cold temperatures after a warm spell early in the season. Onion maggot damage also stresses plants into bolting. If the stalk has formed, snap it off and use the plant fresh; bolted onions do not store well.
How do I get my onions to grow bigger?
Spacing is the biggest lever: 5 to 6 inches between plants gives bulbs room to size up. Feed nitrogen early in the season to push leaf growth (more leaves mean more energy for the bulb). Remove any flower stalks promptly. Plant a variety suited to your day length, since an off-type variety simply will not bulb up correctly regardless of care.