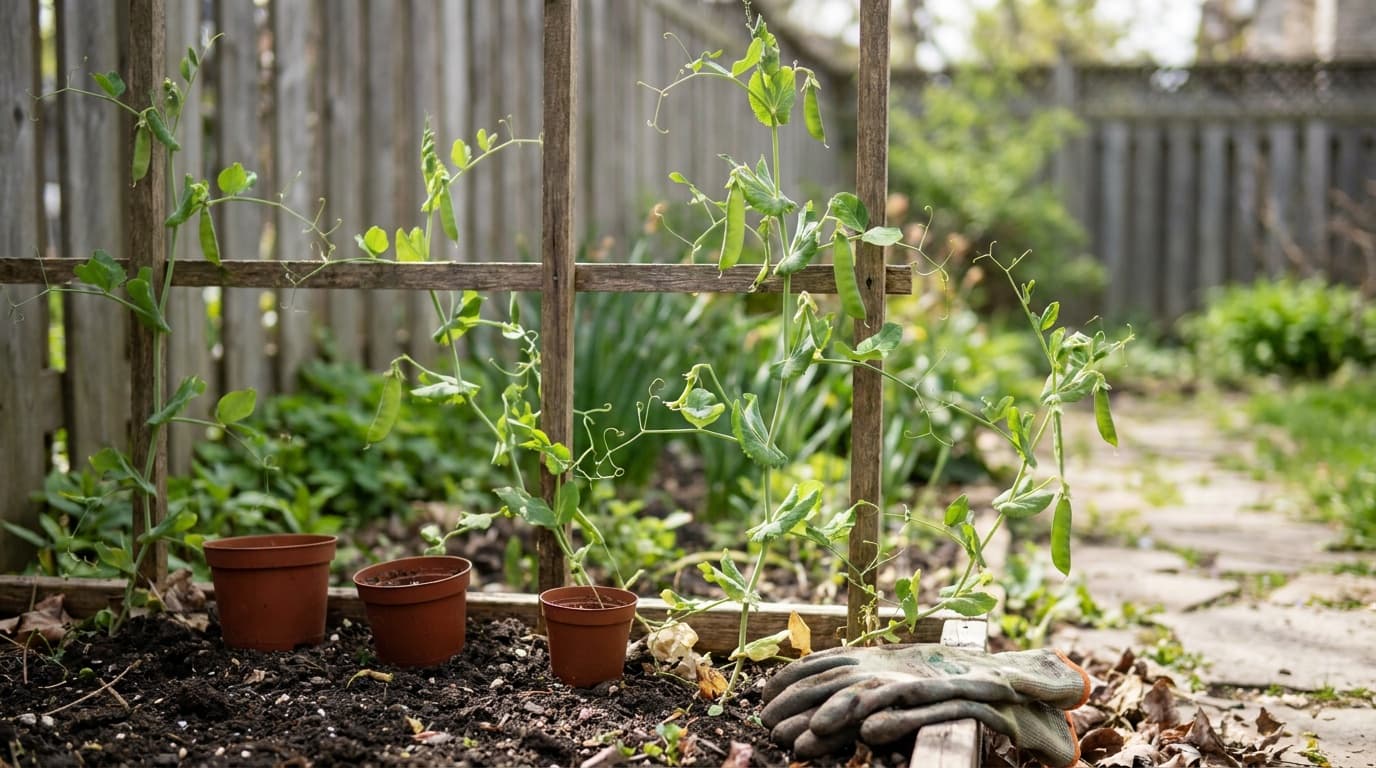
Peas need the most attention at planting and harvest. Cool, wet soil can rot seed and young roots. Near harvest, pods can change from sweet to starchy quickly. Prepare the bed, install support early, and pick often.
Use the pea plant profile for the local sowing season, seed depth, mature plant layout, sun requirement, and harvest estimate. The planting calendar and frost dates tools provide the local schedule. The spacing calculator can then estimate capacity from the profile's bed-layout data.
Pick the pea you want to harvest
Shelling peas are grown for the round peas inside. The pod is discarded once the seeds are full and sweet.
Snow peas are harvested while the pod is broad and flat. The tender pod is the main crop.
Sugar snap peas are harvested after the pod rounds out but while the pod wall still snaps cleanly. Both pod and peas are eaten.
The three types share the same basic culture, but the harvest cue is different enough that labels matter. Mark rows by type and cultivar so one bed is not picked at the wrong stage.
Prepare for cool, damp soil
Drainage is the first bed decision. Peas often grow while soil is naturally moist, and a low area that stays saturated can lose seed to decay or seedlings to damping off and root rot.
Loosen compacted areas and add mature compost for structure. Avoid a large nitrogen application. Peas can partner with compatible soil bacteria to form nitrogen-fixing nodules, while excess nitrogen promotes vines at the expense of flowers.
Install support before sowing
Even compact varieties stay cleaner and are easier to pick when they can lean on a low fence or neighboring vines. Tall varieties need a firm trellis. Build it before sowing so stakes do not pierce roots later.
Set up a pea support
Read the mature habit
Anchor both ends
Offer fine climbing points
Keep the bottom reachable
Two rows of stakes with horizontal twine work well for tall peas. Compact varieties can use a low fence or a dense wide-row arrangement where tendrils interlock. The support is technique-specific, while the mature plant layout should follow the pea plant profile.
Direct sow and protect the stand
Follow the plant profile for seed depth and bed layout. Firm the surface gently and water only enough to settle the soil. Pea seed is large and can crack during rough handling; damaged seed is more vulnerable to decay.
If birds or rodents pull seed, cover the bed with lightweight mesh until seedlings are established. If rain forms a crust, loosen only the surface with a rake rather than digging through the emerging roots.
Several small sowings about a week apart can spread the harvest without pushing the crop far outside its preferred season. Use the local calendar to decide whether later batches still have a realistic window.
Water and feed without encouraging disease
Peas may need little irrigation in a rainy spring, but a dry root zone during flowering can reduce pod set. Check beneath the surface and water at the soil line when needed. The exact benchmark belongs in the plant profile because rainfall and soil texture determine frequency.
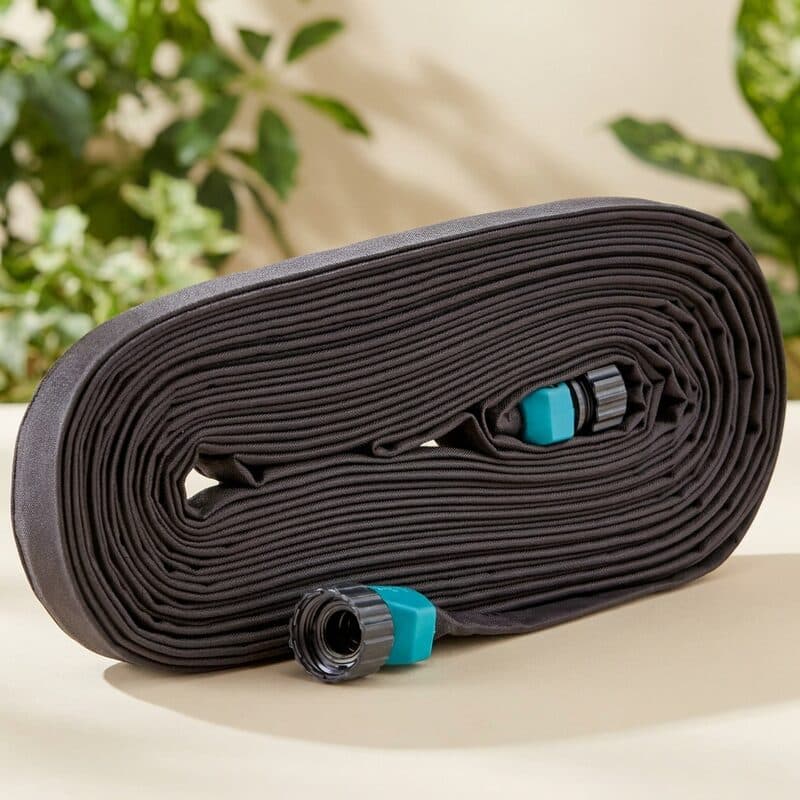
A soaker hose keeps foliage dry and places water where shallow roots can use it.
Some links on this page are affiliate links. As an Amazon Associate I earn from qualifying purchases.
Keeps foliage dry
Gilmour Flat Weeper Soaker Hose
Best for: Row and border gardeners who want low-waste, root-zone watering on a budget.
Keep in mind: Even output drops over very long runs and on slopes
Amazon price as of the checked date, subject to change. The price on Amazon at checkout applies.
Full research
- Type
- Flat weeper soaker hose
- Lengths
- Available in multiple lengths
- Delivery
- Seeps along the full length
- Connection
- Standard hose faucet
Gilmour's flat weeper soaker hose seeps water along its length to deliver moisture at the root zone, lying flat along rows and borders.
This catalog-wide research score is separate from this guide's use-case ranking. How we research
Strengths
- Delivers water directly to the root zone with little waste
- Flat profile lies neatly along rows and borders
- Inexpensive and easy to route through a bed
Weaknesses
- Even output drops over very long runs and on slopes
- Should be drained and stored to avoid winter damage
Sprout Score breakdown
Best for
Row and border gardeners who want low-waste, root-zone watering on a budget.
Owner rating snapshot
Amazon · 49 reviews · 4.2 stars
Avoid walking or working among wet vines. Moist foliage and physical contact help move fungal and bacterial problems through a dense planting. Mulch after emergence to limit soil splash and reduce weeds.
Troubleshoot a pea planting
What pea symptoms mean
White powder spreads over leaves
Yellow patches hide gray growth below
Growing tips carry soft insects
Plants wilt in wet soil
Flowers stop making pods
Choose resistant cultivars when powdery mildew, downy mildew, fusarium wilt, or mosaic has been a recurring local problem. Remove crop residue at the end of the season and rotate peas with unrelated crops.
Harvest each type at the right stage
Read pea pods by type
Shelling peas
Snow peas
Sugar snap peas
Overlooked pods
Check vines daily once pods begin filling. Hold the vine with one hand and detach the pod with the other so you do not pull the plant from its support.
After the crop finishes, clear vines and replant the bed with a warm-season crop. Tomatoes or cucumbers can follow, while lettuce and spinach can share a cool-season plan.
Do peas need a trellis?
Tall varieties do. Compact types may support each other in a dense bed, but a low fence keeps pods cleaner and easier to find. Install any support before sowing.
Why did my peas stop setting pods?
Heat or moisture stress is the usual cause when otherwise healthy vines stop. Keep the root zone steady and review the local season in the pea plant profile before planning the next crop.
What is the difference between snow peas and sugar snap peas?
Snow peas are harvested while the pod is flat and tender. Sugar snap peas stay on the vine until the pod rounds out, and both the crisp pod and developed peas are eaten.
Why are my shelling peas starchy?
The pods were probably left too long or stayed warm after picking. Sample daily as pods fill, harvest while they remain bright, and chill them immediately.
Can peas grow in containers?
Yes. Compact cultivars fit a deep container, while taller peas need more soil volume and a stable support. Containers warm and dry quickly, so monitor the root zone closely.
What to do next
Choose the pod type first, give the roots a drained bed, install a support before sowing, and pick at the correct stage every day. Those decisions preserve the sweetness that makes homegrown peas worth the space.